Grocer

Multi-vendor Grocery, Food Ordering and Ecommerce Marketplace

Overview

Grocer is a Multi-Vendor Grocery and Food Ordering eCommerce system that allows you to create grocery and food ordering marketplace in the lowest price. Grocer is a feature-rich eCommerce software having each standard and premium eCommerce features that you will not find on any other eCommerce platforms.

This document will help you understand the system and will allow you to learn every single feature of the system that you may not know. In this document, you will find how to install a system, how to track data, and how to configure system features.

Installation

The Installation of Grocer Marketplace is very simple and easy. Download and Extract the purchased grocer script from and you will find folders inside it.

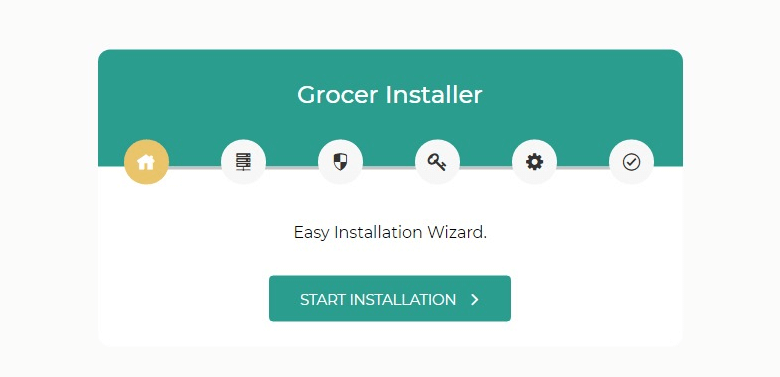
  • 1st Step: Upload files from Grocer folder to your server and open Domain URL. You will see the Grocer installation page in your screen as shown below in the Image, Now click on start Installation. Installation
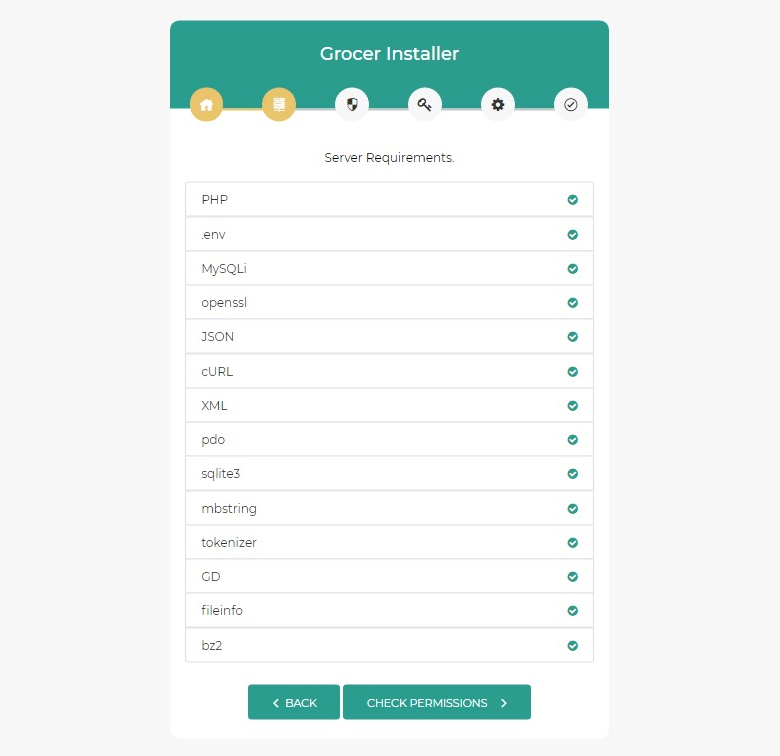
  • 2nd Step: In second screen, you will see server requirements that need to be enabled to continue the installation. PHP version needs to be >7.3 and all the server extensions need to be enabled. If you don't know how to do it then contact your hosting provider. After enabling all click on Check Permissions button. Installation
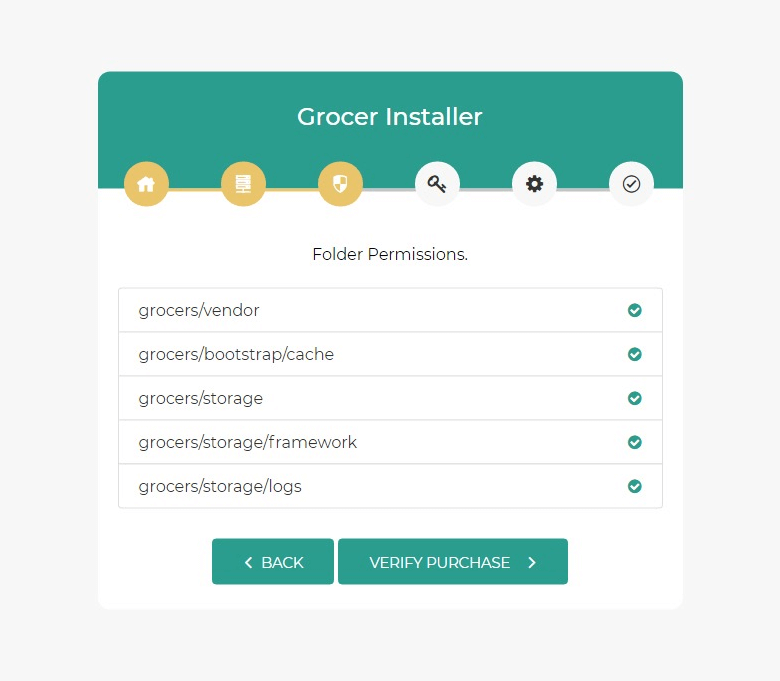
  • 3rd Step: In third step, you will see folder permission requirements that needs to be writable(775) as shown below in the image. Give 775 permission to the folders that require writable permission to continue the installation. After changing permission click on Verify Purchase button. Installation
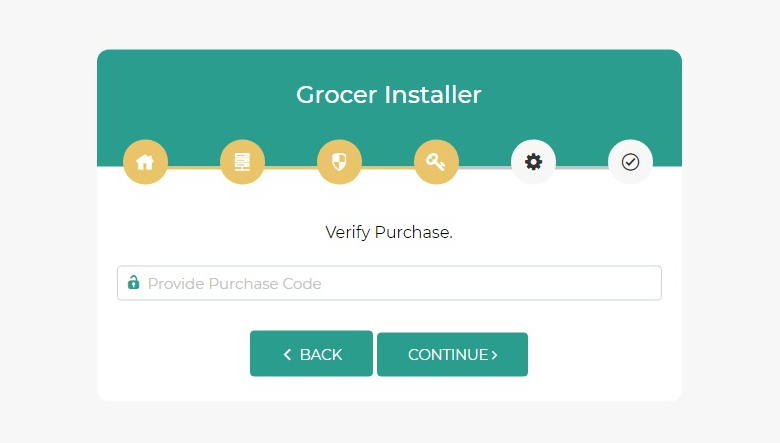
  • 4th Step: In fourth screen, you will see the Purchase code verification screen. You must enter the purchase code to continue installation, after entering the purchase code click on Continue button. Installation
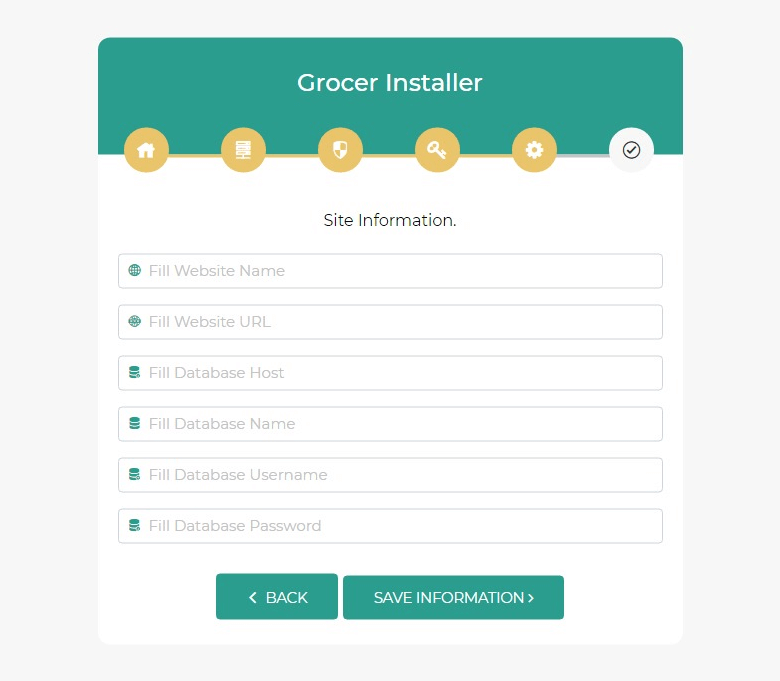
  • 5th Step: In fifth screen, you will find Site information and database details that needs to be filled. Create a database in your server; after creating a database enter database and site information. Now click on Save Information button and wait for it to complete, it will take little more time for the next screen. Installation
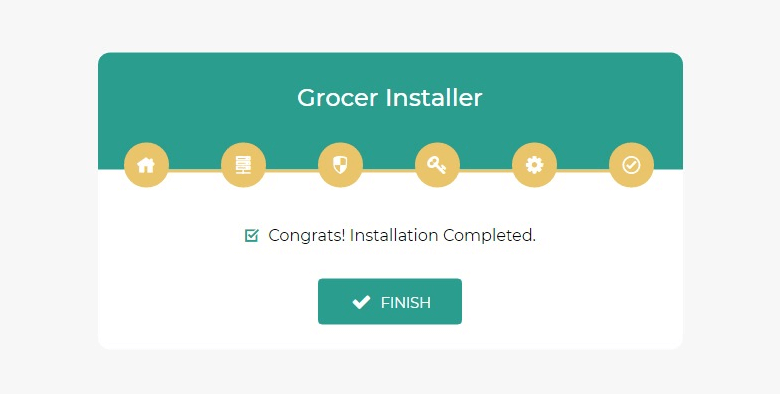
  • 6th Step: In sixth screen, you will see that installation is completed, now click on Finish button and it will take you to the home page of the website. You must need to click on Finish button to complete the installation. Installation

Now you can login to Admin Dashboard, The login information is same as the demo site.

Admin URL: yourdomain/admin

Username: admin@demo.com

Password: admin@1234

Dashboard

The Dashboard of Admin panel will display the yearly statistics of the platform, e.g completed orders, pending orders, processing orders, total products, total customers, and total vendors. The Dashboard will also display data of recent orders, recent products, popular products, recent customers, and recent vendors.

Chart of Last 12 Month Statistics: The best-designed chart in Dashboard will display the last 12 months statistics of completed orders, pending orders, and processing orders. The Chart is completely dynamic and you can toggle the chart elements by clicking on the label on top of the chart area.

Cards of Last 12 Month Statistics: The cards in Dashboard will display the last 12 months numbers of completed orders, pending orders, processing orders, total products, total customers, and total vendors.

Recent Data: The tabs on the bottom of the Dashboard will display the summary of most recent orders, recent products, popular products, recent customers, and recent vendors.

Notifications: The bell icon on header will show the notifications for new orders, new users, and new products, you can click on the notification link and it will take you to the relative detail page.

Message Notifications: The message icon on header will show the notifications for new messages, you can click on the notification link and it will take you to the chat screen.

Edit Profile: The dropdown with your profile image will toggle the account links. Clicking on edit profile will take you to the edit profile screen where you can edit your information.

Change Password: Clicking on change password will take you to the change password screen where you can change admin login password.

Logout: You can logout of your account on clicking on Logout link.

Theme Color Scheme Settings: The dropdown with settings icon will toggle section where you can change theme colors. You can change admin theme color, admin theme style, and front website theme color on one click.

Add Product

Products can be added from here, enter all the details of the product along with product feature image and product image gallery.

You can select the category of the product and attributes of that category will display here, select the attributes and it will be reflected on the product search on the front website. You can add a YouTube video URL to show the video of the product in website. Multiple product sizes can be added with additional size price. Wholesale product discounts can be added here along with the SEO settings.

All Products

All products of the store will be listed here, you can see products of all vendors along with your own products. You can sort results by clicking on any header column except Actions column.

The filter on top will allow you to find the products; enter any keywords and it will search values from all listed columns. You can display number of results by changing show entries dropdown. Admin can export the data in PDF, Excel, CSV format and can also print the data.

Admin can change the status of products, view product details, edit product details, update product gallery, and can delete the product.

Highlight Product: Admin can highlight the product in featured, best seller, smart basket and sale sections of the home page.

Import Products

Bulk products can be uploaded from here. Download the sample CSV file for upload products by clicking on Download Sample CSV button, add your product data in the CSV file and import the CSV file, the data needs to be in the same format as the sample.

Product Reviews

Reviews of all the products will be listed here, you can see review details of all the products. You can sort results by clicking on any header column except Actions column.

The filter on top will allow you to find the reviews; enter any keywords and it will search values from all listed columns. You can display number of results by changing show entries dropdown. Admin can export the data in PDF, Excel, CSV format and can also print the data.

Admin can change the status of reviews, view review details, and can delete the review.

Enable/Disable Reviews on the Website: Admin can enable or disable the review feature for website, if reviews are disabled then it won't show the product reviews on the website and user won't be able to submit the review.

Product Comments

Comments of all the products will be listed here, you can see comment details of all the products. You can sort results by clicking on any header column except Actions column.

The filter on top will allow you to find the comments; enter any keywords and it will search values from all listed columns. You can display number of results by changing show entries dropdown. Admin can export the data in PDF, Excel, CSV format and can also print the data.

Admin can change the status of comments, view comment details, and can delete the comment.

Enable/Disable Comments on the Website: Admin can enable or disable the comment feature for website, if comments are disabled then it won't show the product comments on the website and user won't be able to submit the comment.

Flag Reported Products

All the reported products by user will be listed here, you can see details of product flags. You can sort results by clicking on any header column except Actions column.

The filter on top will allow you to find the reported products; enter any keywords and it will search values from all listed columns. You can display number of results by changing show entries dropdown. Admin can export the data in PDF, Excel, CSV format and can also print the data.

Admin can view details, and can delete the flag.

Enable/Disable Product Flags on the Website: Admin can enable or disable the flag feature for website, if product flag is disabled then user won't be able to report the flag product.

Main Categories

All the main categories of products will be listed here. You can sort results by clicking on any header column except Actions column.

The filter on top will allow you to find the main categories; enter any keywords and it will search values from all listed columns. You can display number of results by changing show entries dropdown. Admin can export the data in PDF, Excel, CSV format and can also print the data.

Admin can change the status of category, add new category, edit category, and can delete the category.

Highlight Category: You can highlight the category in home page for featured and popular category sections by selecting checkboxes that you will find in add and edit category page.

Category Attributes: Admin can add and manage the attributes for particular category with multiple options. This attributes are dynamic search filter that will be shown in product search filter area on the front website. This attributes will be seen as a search filter for the particular category in which you have added it.

Subcategories

All the Subcategories of products will be listed here. You can sort results by clicking on any header column except Actions column.

All other operations will be as same as the Main Category.

Sub Subcategories

All the Sub Subcategories of products will be listed here. You can sort results by clicking on any header column except Actions column.

All other operations will be as same as the Main Category.

All Orders

All the orders will be listed here. You can sort results by clicking on any header column except Assign Order & Actions column.

The filter on top will allow you to find the orders; enter any keywords and it will search values from all listed columns. You can display number of results by changing show entries dropdown. Admin can export the data in PDF, Excel, CSV format and can also print the data.

Assign Order: Admin can assign order to delivery boy by selecting Delivery Boy from dropdown list. The assigned order then can be seen by that particular delivery boy in their Delivery Boy Dashboard and they will be able to manage the order tracking.

Track Order: Admin can update the order tracking details and user will be notified by mail.

Send Email: Admin can send email to user from here.

View Order Details: Admin can see all the details of order along with the user details. Admin will be able to see user details, order items, order pricing, billing details, shipping details, order status, payment status, payment type, transaction id, order assigned details and many more.

Order Invoice: Admin will be able to see the order invoice from order details page, invoice can be downloaded as PDF or can be printed as well.

Pending Orders

All the pending orders will be listed here. You can sort results by clicking on any header column except Assign Order & Actions column.

All other operations will be as same as the All Orders section.

Processing Orders

All the processing orders will be listed here. You can sort results by clicking on any header column except Assign Order & Actions column.

All other operations will be as same as the All Orders section.

Completed Orders

All the completed orders will be listed here. You can sort results by clicking on any header column except Assign Order & Actions column.

All other operations will be as same as the All Orders section.

On Delivery Orders

All the orders that are On Delivery will be listed here. You can sort results by clicking on any header column except Assign Order & Actions column.

All other operations will be as same as the All Orders section.

Vendor List

All vendors of the store will be listed here. You can sort results by clicking on any header column except Actions column.

The filter on top will allow you to find the vendors; enter any keywords and it will search values from all listed columns. You can display number of results by changing show entries dropdown. Admin can export the data in PDF, Excel, CSV format and can also print the data.

Admin can change the status of vendor, ban vendor, add vendor, view vendor details, edit vendor details, and can delete the vendor.

Enable/Disable Vendor Registrations: Admin can enable or disable the vendor registrations, if vendor registration is disabled then user won't be able to register as a vendor.

Highlight Vendor: Admin can highlight the vendor in popular brands sections on the home page by selecting checkbox in add and edit vendor page.

Secret Login: Admin can secretly login to vendor dashboard on a single click.

Ask for Verification: Ask vendor to submit their documents so that they can be manually verified by admins.

Send Email: Admin can send email to vendors from vendor details page.

Vendor Verification

All verification request and data will be listed here. You can sort results by clicking on any header column except Actions column.

The filter on top will allow you to find the vendor verification; enter any keywords and it will search values from all listed columns. You can display number of results by changing show entries dropdown. Admin can export the data in PDF, Excel, CSV format and can also print the data.

Admin can view the verification details and submitted documents by vendor so that they can accept or reject the verification, verification details also can be deleted.

Vendor Subscriptions

All vendors membership subscription will be listed here. You can sort results by clicking on any header column except Actions column.

The filter on top will allow you to find the vendor subscriptions; enter any keywords and it will search values from all listed columns. You can display number of results by changing show entries dropdown. Admin can export the data in PDF, Excel, CSV format and can also print the data.

Admin can view the subscription details, change subscription status, change payment status, and can delete the subscription.

Vendor Withdrawals

All vendors withdrawals will be listed here. You can sort results by clicking on any header column except Actions column.

The filter on top will allow you to find the vendor withdrawals; enter any keywords and it will search values from all listed columns. You can display number of results by changing show entries dropdown. Admin can export the data in PDF, Excel, CSV format and can also print the data.

Admin can view the withdrawal details, and can accept or reject the withdrawals.

Vendor Subscription Plans

Subscription plans for the Vendor will be listed here. You can sort results by clicking on any header column except Actions column.

The filter on top will allow you to find the subscription plan; enter any keywords and it will search values from all listed columns. You can display number of results by changing show entries dropdown. Admin can export the data in PDF, Excel, CSV format and can also print the data.

Admin can add, edit, delete, active, and deactivate the subscription plans.

Customers

All customers of the website will be listed here. You can sort results by clicking on any header column except Actions column.

The filter on top will allow you to find the customers; enter any keywords and it will search values from all listed columns. You can display number of results by changing show entries dropdown. Admin can export the data in PDF, Excel, CSV format and can also print the data.

Admin can view, add, edit, delete, activate, deactivate, and ban the customers.

View Customer Details: Admin can see all the details of customers along with their order details.

Send Email: Admin can send email to user from user details page.

Delivery Boys

All delivery boys will be listed here and can be added only from admin panel, no delivery boy can register in the system for now. You can sort results by clicking on any header column except Actions column.

The filter on top will allow you to find the delivery boys; enter any keywords and it will search values from all listed columns. You can display number of results by changing show entries dropdown. Admin can export the data in PDF, Excel, CSV format and can also print the data.

Admin can view, add, edit, delete, activate, deactivate, and ban the delivery boys.

View Delivery Boy Details: Admin can see all the details of delivery boys along with the orders assigned to them.

Send Email: Admin can send email to delivery boy from delivery boy details page.

Subscribers

All the newsletter subscribers will be listed here. You can sort results by clicking on any header column except Actions column.

The filter on top will allow you to find the subscribers; enter any keywords and it will search values from all listed columns. You can display number of results by changing show entries dropdown. Admin can export the data in PDF, Excel, CSV format and can also print the data.

Admin can view, and delete the subscribers from here.

Admins

All admin users will be listed here. You can sort results by clicking on any header column except Actions column.

The filter on top will allow you to find the admins; enter any keywords and it will search values from all listed columns. You can display number of results by changing show entries dropdown. Admin can export the data in PDF, Excel, CSV format and can also print the data.

Admin can view, add, edit, delete, activate, and deactivate the admins.

Manage Admin: Admin can add the admin users and can select the role of Admin. That particular admin will be able to access the features that are on their roles.

Send Email: Admin can send email to admin user from admin details page.

Role Management

All admin roles will be listed here. You can sort results by clicking on any header column except Actions column.

The filter on top will allow you to find the roles; enter any keywords and it will search values from all listed columns. You can display number of results by changing show entries dropdown. Admin can export the data in PDF, Excel, CSV format and can also print the data.

Admin can add, edit, delete, activate, and deactivate the admin roles.

Manage Role: Admin can add/edit the Role and assign permissions to that role. Role now can be assigned to admin users and they will be able to access the features that are on their role permissions.

Tickets

All admin contact requests will be listed here. You can sort results by clicking on any header column except Actions column.

The filter on top will allow you to find the tickets; enter any keywords and it will search values from all listed columns. You can display number of results by changing show entries dropdown. Admin can export the data in PDF, Excel, CSV format and can also print the data.

Admin can view, add, and delete the tickets.

Chat: Admin can chat with the users from message chat screen.

Mark Closed: Admin can mark the chat as closed from here.

Disputes

All order dispute(User can open the dispute from their orders screen) will be listed here. You can sort results by clicking on any header column except Actions column.

The filter on top will allow you to find the disputes; enter any keywords and it will search values from all listed columns. You can display number of results by changing show entries dropdown. Admin can export the data in PDF, Excel, CSV format and can also print the data.

Admin can view, add, and delete the disputes.

Chat: Admin can chat with the users from message chat screen.

Mark Closed: Admin can mark the chat as closed from here.

Theme Customization

Most of the front-end, vendor and store settings will be configured here.

Logos & Icons: Logo, Dark Theme Logo(Footer Logo), Favicon Icon and Loader can be updated from here, you can enable or disable the loader.

Website Settings: Store title, tag line, email, phone and address can be edited here. Admin can enable or disable the HTTPS, Home Page Link in Website, Guest Checkout, Captcha, Signup Email Verification, Stocks Visibility, and Maintenance mode.

Admin can change website Timezone, Date Format, Time Format, Currency Format, and Tax from here.

Admin can change Vendor Withdrawal Fee, Vendor Withdrawal Charge, and Vendor Commission from here.

Admin can manage Maintenance Mode page from here.

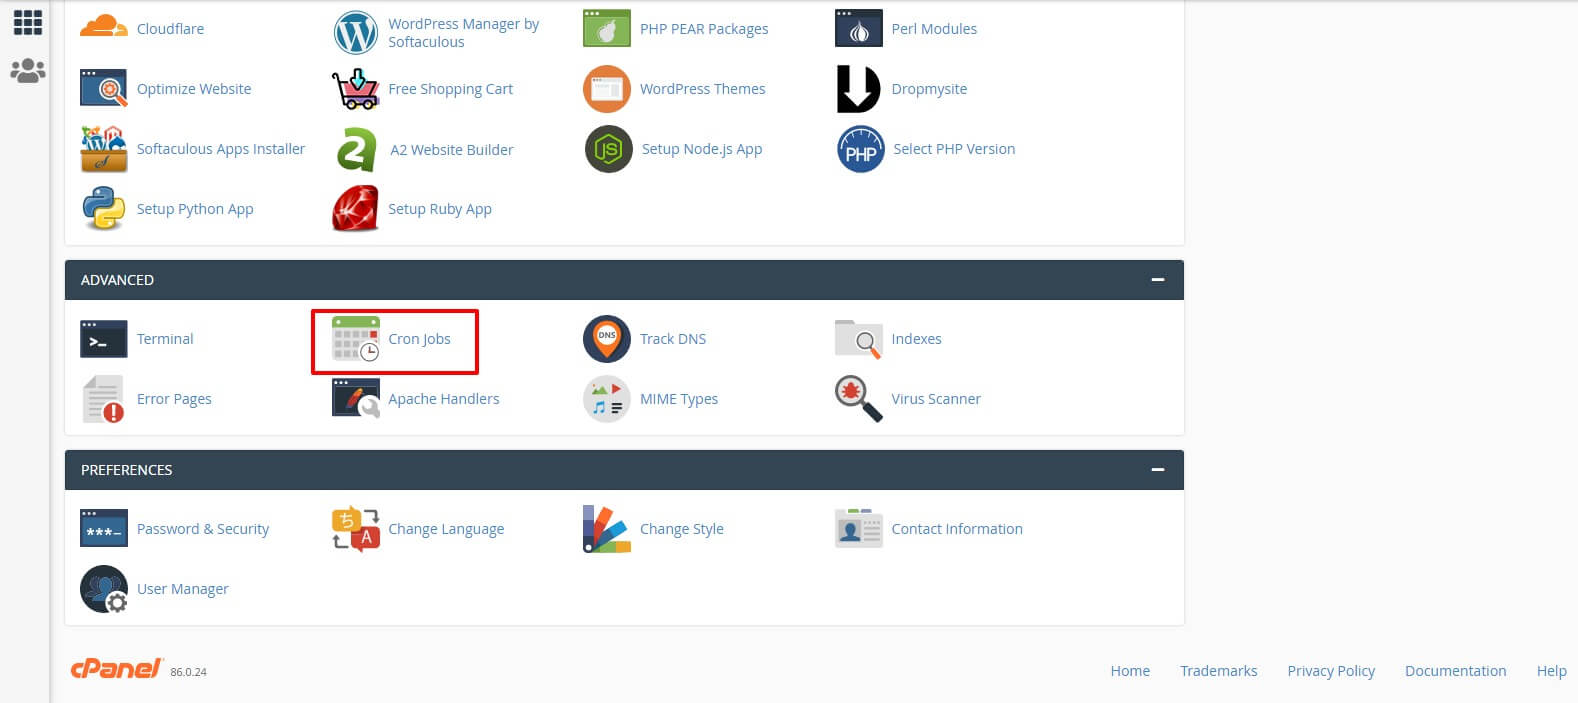
Cron Job: You will find cron job URL in Website tab, cron job needs to be set(24 Hours) for this URL in order to detect and manage the vendor subscription plans dynamically. This cron job will check the vendor subscriptions and will deactivate the features when membership expires. Cron jobs section can be found in your Hosting cPanel as shown in the image.

Cron Job

Home Page Settings: Admin can enable or disable the sections on website home page from here.

Social Links: Admin can set the stores social media links from here.

Newsletter: Admin can enable or disable the Newsletter Popup in website, the details of newsletter popup can be updated from here.

Footer: Admin can change footer content and copyright text from here.

Code Editor: Additional Tracking Codes(eg. Analytics, Live Chat, etc), CSS and JavaScript codes can be added here.

Google Map Settings: Admin can set the google map API here. This key will be used to generate the map in checkout page for enable users to select their location on map. Besides map there is a field to allow admin to set only those cities where store delivers the product.

Banners

All home page banners will be listed here. You can sort results by clicking on any header column except Actions column.

The filter on top will allow you to find the banners; enter any keywords and it will search values from all listed columns. You can display number of results by changing show entries dropdown. Admin can export the data in PDF, Excel, CSV format and can also print the data.

Admin can add, edit, activate, deactivate, and delete the banners.

Sliders

All home page sliders will be listed here. You can sort results by clicking on any header column except Actions column.

The filter on top will allow you to find the sliders; enter any keywords and it will search values from all listed columns. You can display number of results by changing show entries dropdown. Admin can export the data in PDF, Excel, CSV format and can also print the data.

Admin can add, edit, activate, deactivate, and delete the sliders. You can create slider dynamically from here by choosing slider style settings.

Language Settings

All languages of the store will be listed here. You can sort results by clicking on any header column except Actions column.

The filter on top will allow you to find the languages; enter any keywords and it will search values from all listed columns. You can display number of results by changing show entries dropdown. Admin can export the data in PDF, Excel, CSV format and can also print the data.

Admin can add, edit and delete the languages, the default language can be set from here.

Enable/Disable Languages: Admin can enable or disable the languages, if languages are disabled then users won't be able to change the store language.

Manage Languages: Languages can be added and edited along with the language text changes. Admin can change the language texts as per their needs. When new language is created then language texts must need to be changed.

RTL: RTL for languages can be set in add and edit language page, when user select language that has RTL enabled then store direction will be right to left.

Payment Settings

All payment gateways will be listed here. You can activate or deactivate the payment gateways as per your need.

Payment Mode: Admin can change the payment mode to test or live, when test mode is enabled then the real payment can't be processed. You also need to change the payment settings when you change the payment mode.

Payment Settings: You will need to update your payment credentials which you will find in your account on relative payment gateway website.

Email Settings

Email templates and settings will be accessed from here.

Admin can edit the email templates.

SMTP Configurations: You can enable or disable the SMTP mail, if SMTP is enabled then the SMTP settings must need to be updated from here.

Mail Broadcast: Admin can broadcast the email to selected user type(Vendor, Customer, Subscriber).

Third Party Settings

All the third-party settings(Google Login, Facebook Login and Progressive Web App) can be configured here.

Facebook Login: You can enable or disable the Facebook Login, if it is disabled then user won't be able to login using Facebook. Facebook Credentials can be fetched from developers.facebook.com, you also need to set URL in Valid OAuth Redirect URI on developers.facebook.com.

Google Login: You can enable or disable the Google Login, if it is disabled then user won't be able to login using Google. Google Credentials can be fetched from console.cloud.google.com, you also need to set URL in Redirect URL on console.cloud.google.com.

PWA(Progressive Web App): You can enable or disable the PWA, if it is disabled then user won't be able to download website as an application in mobile phone. You can set app icon and splash screen from here.

Currency Settings

All currencies of the store will be listed here. You can sort results by clicking on any header column except Actions column.

The filter on top will allow you to find the currencies; enter any keywords and it will search values from all listed columns. You can display number of results by changing show entries dropdown. Admin can export the data in PDF, Excel, CSV format and can also print the data.

Admin can add, edit and delete the currencies, the default currency can be set from here.

Enable/Disable Currencies: Admin can enable or disable the currencies, if currencies are disabled then users won't be able to change the store currency.

Manage Currency: Currencies can be added and edited along with the exchange rates.

Shipping Methods

All shipping methods will be listed here. You can sort results by clicking on any header column except Actions column.

The filter on top will allow you to find the shipping methods; enter any keywords and it will search values from all listed columns. You can display number of results by changing show entries dropdown. Admin can export the data in PDF, Excel, CSV format and can also print the data.

Admin can add, edit, activate, deactivate and delete the shipping methods.

Enable/Disable Shipping Methods: Admin can enable or disable the shipping methods, if shipping methods are disabled then users won't be able to select shipping methods when ordering.

Pickup Locations

All pickup locations will be listed here. You can sort results by clicking on any header column except Actions column.

The filter on top will allow you to find the pickup locations; enter any keywords and it will search values from all listed columns. You can display number of results by changing show entries dropdown. Admin can export the data in PDF, Excel, CSV format and can also print the data.

Admin can add, edit, activate, deactivate and delete the pickup locations.

Offer Coupons

All offer coupons will be listed here. You can sort results by clicking on any header column except Actions column.

The filter on top will allow you to find the offer coupons; enter any keywords and it will search values from all listed columns. You can display number of results by changing show entries dropdown. Admin can export the data in PDF, Excel, CSV format and can also print the data.

Admin can add, edit, activate, deactivate and delete the offer coupons.

CMS Pages

All CMS Pages will be listed here. You can sort results by clicking on any header column except Actions column.

The filter on top will allow you to find the CMS Pages; enter any keywords and it will search values from all listed columns. You can display number of results by changing show entries dropdown. Admin can export the data in PDF, Excel, CSV format and can also print the data.

Admin can add, edit, activate, deactivate and delete the CMS Pages.

Allow Contact Form: Admin can enable the contact form in page by turning on "Allow Contact Form" switch on add and edit page.

Blogs

All Blogs will be listed here. You can sort results by clicking on any header column except Actions column.

The filter on top will allow you to find the Blogs; enter any keywords and it will search values from all listed columns. You can display number of results by changing show entries dropdown. Admin can export the data in PDF, Excel, CSV format and can also print the data.

Admin can add, edit, activate, deactivate and delete the Blogs.

Blog Categories

All blog categories will be listed here. You can sort results by clicking on any header column except Actions column.

The filter on top will allow you to find the blog categories; enter any keywords and it will search values from all listed columns. You can display number of results by changing show entries dropdown. Admin can export the data in PDF, Excel, CSV format and can also print the data.

Admin can add, edit, activate, deactivate and delete the blog categories.

Activation

Your purchase activation key will be found here.

Clear Cache

You can clear the system cache from here.

Thank You if you had already purchased Grocer.